Winter Glow Up - How to Make Enchanting Ice Lanterns.
Make glowing ice lanterns with just a few natural materials — a simple Northwoods winter tradition.
ENTERTAINCABIN
11/9/20254 min read
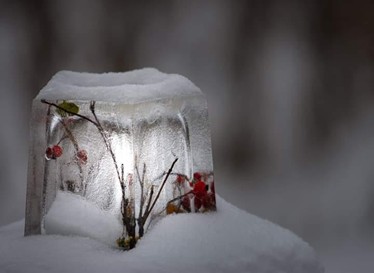

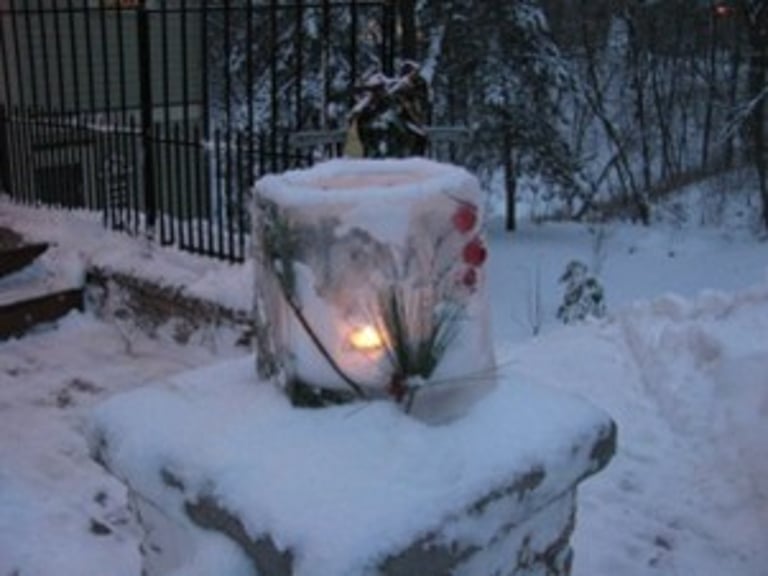
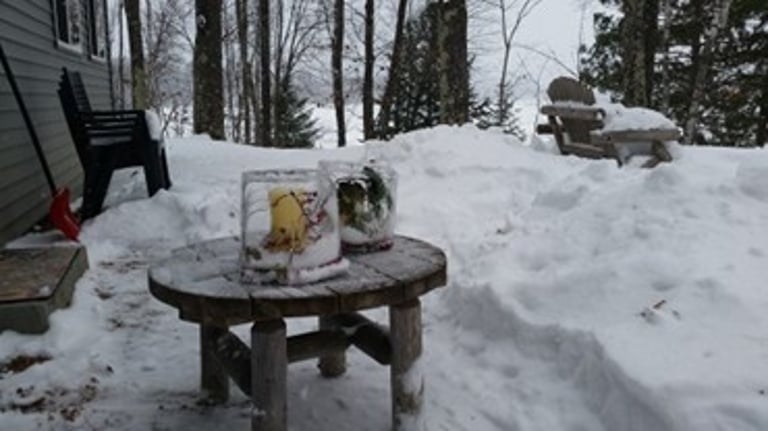
Photo by Terry Mortier
The first time I saw an ice lantern, it glowed on my porch like it had grown right out of the snow. My friend Linda had made it — of course. She’d wandered the woods, gathered a handful of berries and pine, and somehow turned frozen water into something both quiet and full of wonder.
That’s her way. Linda can take the simplest scraps of nature — a feather, a dried stem — and make them feel intentional. She grew up with Scandinavian roots, where winter crafts are normal, even comforting. But she’s never fussy about it. She’s just… good. Creative without trying to be. The kind of friend who shows up with something homemade because she thought you’d smile.
Linda used to live in the Northwoods, and I often received lantern deliveries — little glowing gifts left on my porch. She moved away about five years ago, but she comes back whenever she can. Most winters, she still surprises me with an ice lantern or two. It’s her version of a hug.
The best part? They’re easier to make than you think.
Why Ice Lanterns Feel Special
Up here in northern Wisconsin, winter gives us a long stretch of cold — might as well use it. Ice lanterns are a small celebration of that: simple, seasonal, and gone when the weather shifts. They’re not precious; they’re temporary. That’s what makes them lovely.
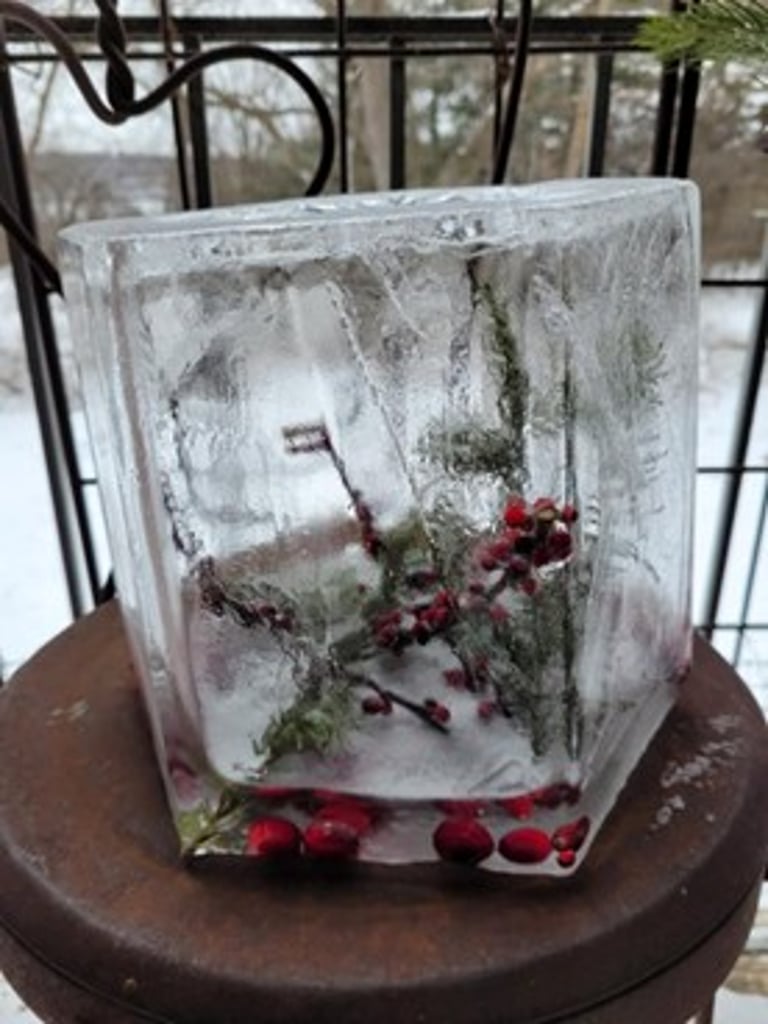
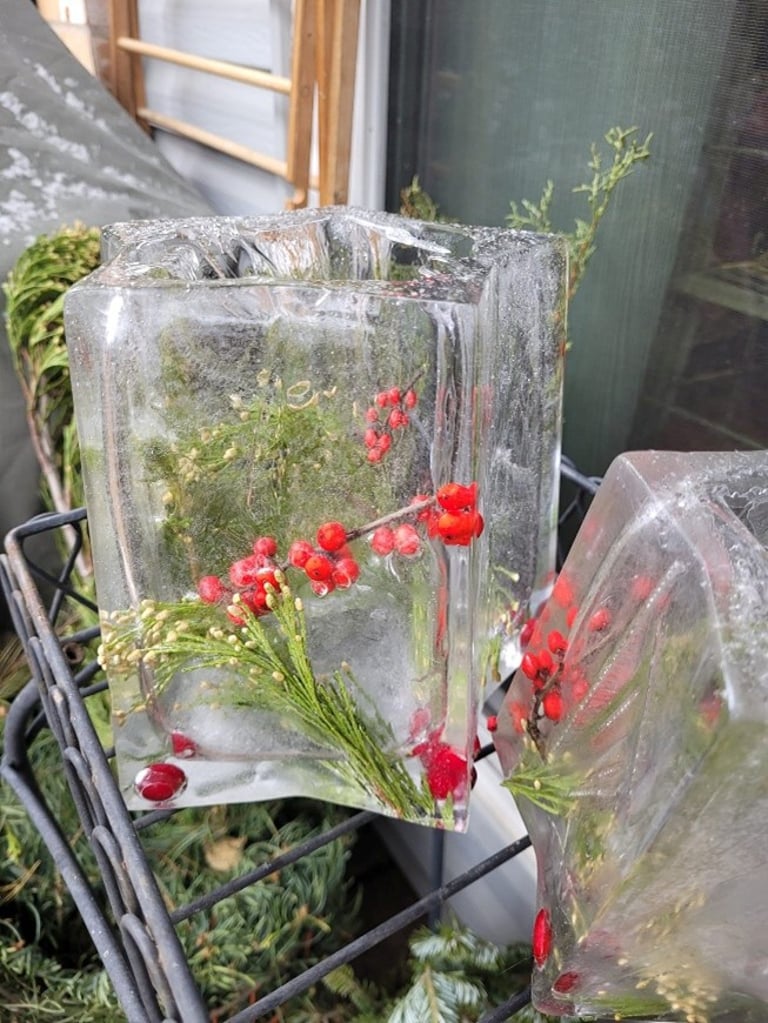
The magic is in the mix of ice and whatever the woods offer — a bright cranberry, a branch with a little bend, a green sprig from the trail. When the candle flickers inside, those everyday bits of nature seem to float.
What You’ll Need
🫙 Molds – silicone and plastic work best; bundt, jello, or thrifted finds
💧 Water – distilled or boiled and cooled for clearer ice
🍃 Natural decorations – cranberries, winterberries, twigs, pine tips, acorns
🕯️ Candle – votive or LED tealight
That’s it. Nothing fancy.
Where To Find Materials
You don’t need anything fancy to make ice lanterns. Molds can be found just about anywhere — thrift stores, your kitchen, or, of course, Amazon. Decorations? Just step outside your cabin door and see what winter has to offer.
Here are some of the materials I’ve used for ice lanterns — all available on Amazon. (Full disclosure: I may earn a small commission if you purchase through these links, at no extra cost to you.)
Set of 4 Medium Fluted Cake Pans: https://amzn.to/3XjnKCe
Set of Star Pans (use a glass to create the candle hole): https://amzn.to/4hMHkAt
Large Ring (Bundt Cake Shape): https://amzn.to/47NpsRk
The most important choice is the mold. From my experience, star-shaped Tupperware, silicone bundt pans, and jello molds work beautifully. They’re easy to release, hold your little woodland decorations just right, and give each lantern a charming shape. I like having a few different shapes and sizes to play with — it keeps the process fun and the results a little magical.
These molds make it easy to turn a cold winter night, a handful of berries, and a little creativity into a glowing, magical lantern.
Making Your Own Lantern
Choose your night
You want steady below-freezing conditions — around 20°F (-6°C) is ideal. Calm, cold evenings freeze more evenly.Pick your mold
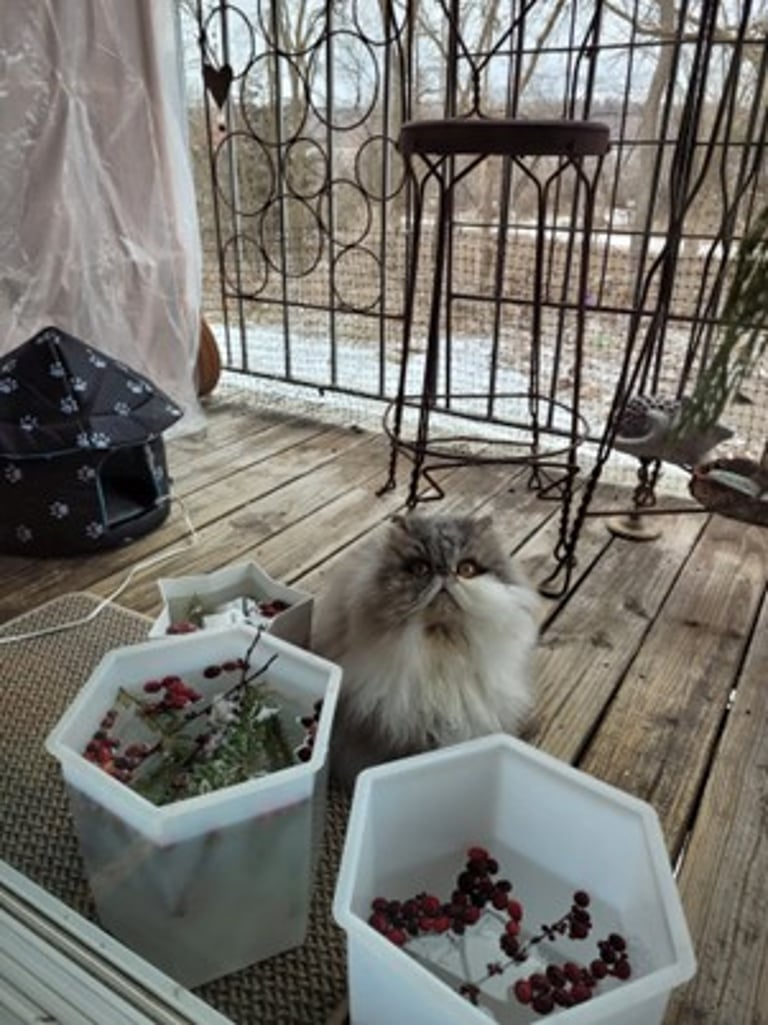
Think cake pans, jello molds or nested bowls (place a smaller bowl inside a larger one to make the hollow for your candle). Tape it, weigh it down, or wedge it with a stick. No need to overthink.Add your nature finds
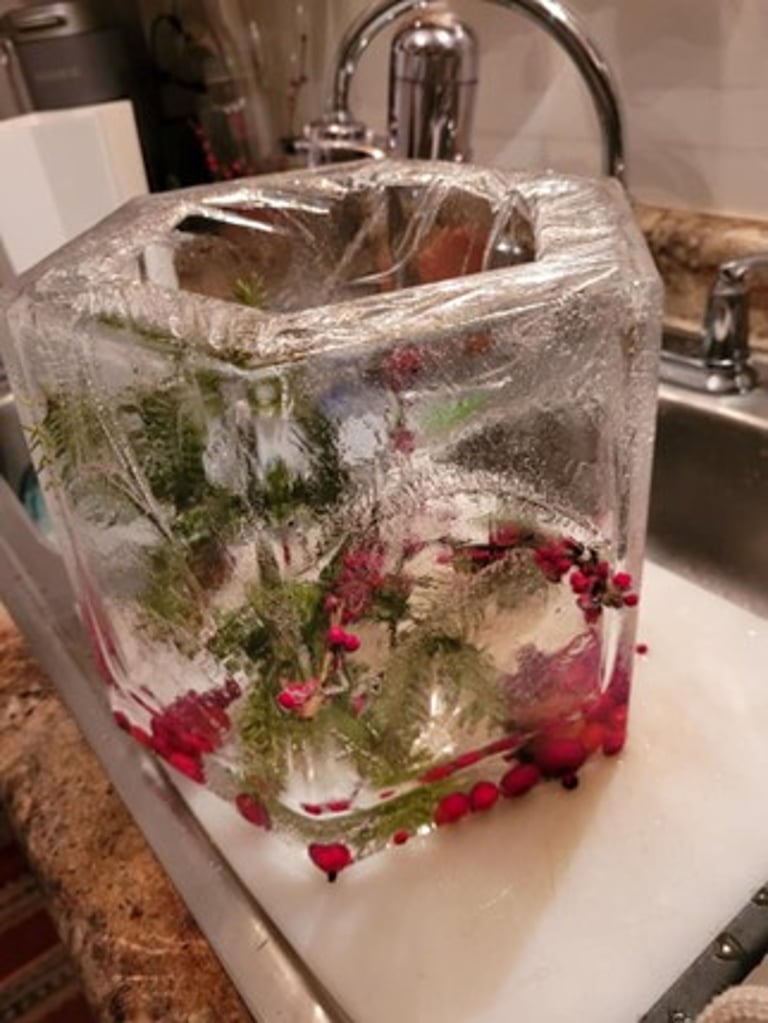
Drop in berries, greens, twigs — whatever looks interesting. A few pieces are enough. Let things fall where they want; part of the charm is letting the ice decide.Fill with water
Slowly pour water into the mold so your decorations stay put. Tap water works fine. If you want clearer ice, use cooled boiled or distilled water.Freeze
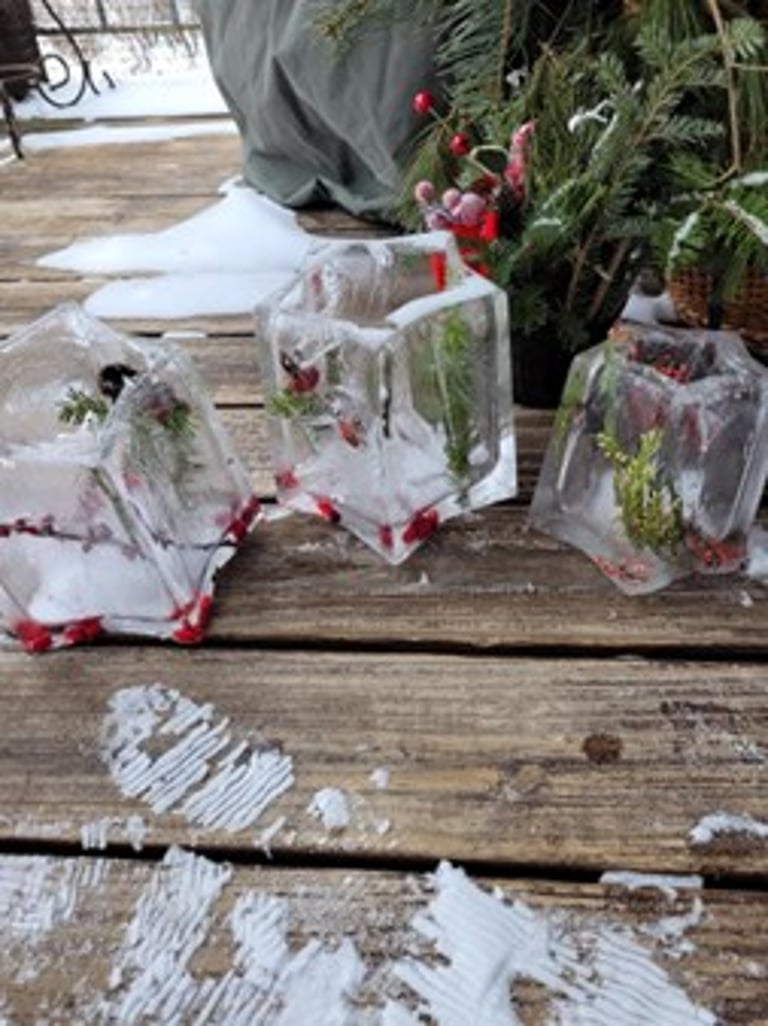
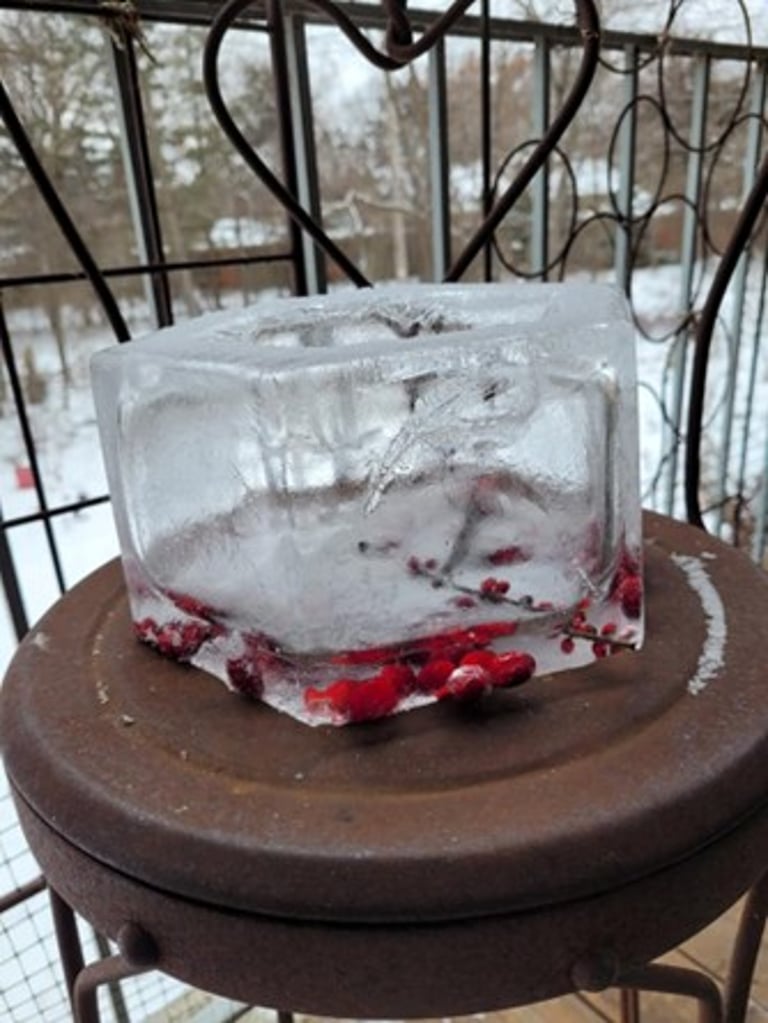
Set the mold outside on a flat tray. If it’s cold enough overnight, you’ll have a solid lantern by morning. Faster freezing makes cloudy ice — so does leaving it outside too long after freezing. Slower freezing can make it clearer. Both are beautiful.Release carefully
When fully frozen, bring the mold inside just long enough for the edges to loosen. Ease it out. For stubborn molds, run a little lukewarm water around the outside.Add the candle
Place a votive or LED tealight in the hollow. If using a real candle, set the lantern on something non-flammable and keep an eye on it. The melting ice will drip.Share
Set one on your porch, line a snowy path, or deliver one to a friend. A lantern on a doorstep says, “I was thinking of you.”
Pro Tips from Linda
🌟 Star-shaped Tupperware/Jello molds work well
💧 For clearer ice, use filtered or boiled water and freeze slowly
❄️ Want texture? Let the outer layer freeze first, then add more water
⚠️ The mold will pop and break if the frozen water is left in too long
🍃 Keep decorations simple — one or two focal elements look best
🕰️ Make a few by staggering start times across a weekend
👧 Kids love gathering the decorations
🕯️ LED candles are easiest for gifting
Why I Love Getting an Ice Lantern
Maybe it’s the surprise of seeing something so simple shine — or the quiet moment of standing outside, watching your breath hang in the air while a small light flickers.
Every year, when I see that first lantern Linda brings me, I’m reminded how little it takes to make something meaningful. A bit of water, a few handfuls of nature, and some time outside — that’s all.
In a world full of complicated projects, ice lanterns are wonderfully humble. They don’t ask much. They don’t last long. But they brighten winter in a way that feels personal.
Give it a try. Make one for yourself, then one to give away.
Because up here, simple things shared between friends are the things that stay warm the longest.
Winter Glow Up
Provide a short description of the gallery, highlighting key things.